Shoulder Stand -Iyengar Yoga Method
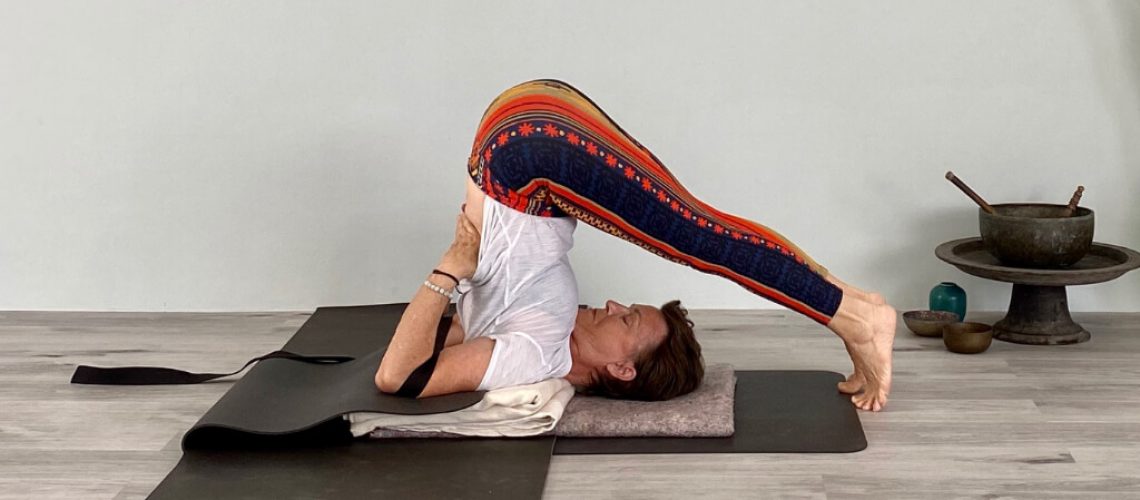
In this class we will go through the three ways to come into Salamba Sarvangasana, depending on your practice and body type.
Prior to learning inversions, we take time in standing poses and lateral extensions to prepare the muscular-skeletal structure. The standing and seated extensions prepare you physically and mentally so that adverse effects can be avoided. Such as high blood pressure, headaches, neck tension, pressure in the eyes, heaviness in the head, and blood rushing to the head.
The preparation in shoulder-stand and Ardha-Halasana is important for the spine and organic body to get lifted without tension in the neck muscles or nerves. This is one of the main reasons why we use support under the shoulders in Iyengar yoga. This provides space for the neck and enables us to stay longer in the pose to get the maximum benefits.
1: Ardha Halasana Preparation of Shoulder Stand with the Support of the Wall.
Stay at this stage until you have the proper support for the shoulders while balancing. First, make sure to externally rotate the outer shoulders. Having your legs at the wall or on a chair will help you learn the correct action before you proceed to the final pose with your legs up. Pressing your feet into the wall and lifting your buttocks while pushing your hips and back up will create lightness, length, and space. Make sure to support your back with the palms and learn to lift the trunk as high as possible.
Eka Pada (one leg lifted) Salamba Sarvangasana– When you have practiced this enough to feel balanced and confident, try it with one leg up while keeping the other at the wall. Alternate both legs and practice lifting the upper leg to create lightness in the trunk. Always remember to keep the lifted leg in the tadasana while maintaining compact outer hips and a level pelvis.
2: Next level: Swinging up with the chair support (either at the wall or on the end of your mat)
Swing the legs and hips from the floor with bent knees and bring the tips of your toes to the chair. If swinging or lifting the buttocks and hips are difficult, add a bolster under your hips.
I want to emphasize the correct learning progression. Once you are ready, come to the full pose (legs up). Always make sure you observe any pressure in your head, neck, or eyes. To avoid the body listing in the direction of your head, lift up, walk the hands down the back, and push the legs away from you so that you feel some weight in your elbows, forearms, and hands. Counterbalance that action by pushing the buttox and tailbone toward your head. If you don’t feel aligned or there is too much pressure in your neck, come down and adjust until you have the correct alignment and balance.
Learn to keep the spine vertically lifted. Remain on the tops of the shoulders and do not cave the chest. If the chest is heavy on the diaphragm take the legs to the high bar of the chair for more space. Spreading the legs will also give more breathing room. Once you come down, slide your upper body off the blankets, rest your back, shoulders and head on the floor. Relax and breathe.
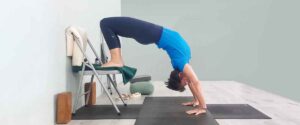
3: Using a chair for support.
Approach this supported shoulder-stand with the chair carefully. It is not difficult, it just takes time to come into it slowly so you don’t topple over!
Make sure to counter balance between the legs and descending head and trunk slowly with awareness. Release the legs from the back of the chair as you move down toward the bolster with a slow release. Once you feel the elbows on the bolster, take your arms under and hold the chair extending the arms through the bottom of the chair to hold the rail in the back. This will give you control to rotate your shoulders and lift of the chest without sliding off. If you slide off…..start again! Enjoy.
P.S: Shoulder stand is taught before sirsasana, headstand. It is important to be proficient in this pose for the needed awareness and intelligence to move further. Shoulder-stand helps us to improve the sense of balance. Learning this pose will be foundational in progressing to head balancing once you have built strength, proper awareness, and have learned the right actions for supporting your body through your practice. Like other inversions, do not practice this while menstruating or have eye issues.

